How to Create Agent
What Are Agents?
Agents in Votel are intelligent virtual assistants designed to communicate with your customers through voice, SMS, or chat. They can call leads, answer queries, schedule appointments, follow up, and even handle complete conversations automatically, just like a real team member.
Each agent can be customized and trained based on your business goals, tone, and workflows, allowing you to create specialized agents for sales, support, or marketing tasks.
Build your first voice agent
Votel makes it easy to build voice agents that can make and receive phone calls. In under 5 minutes, you'll create a voice assistant and start talking to it using web phone.
creating a successfull agent requires some series of action and In this quickstart, you'll learn to:
- Step 1: Create a voice assistant
- Step 2: Select AI model
- Step 3: Set up a phone number
- Step 4: Select voice of your agent
- Step 5: Define personality and tone of your agent
- Step 6: Test and Deploy
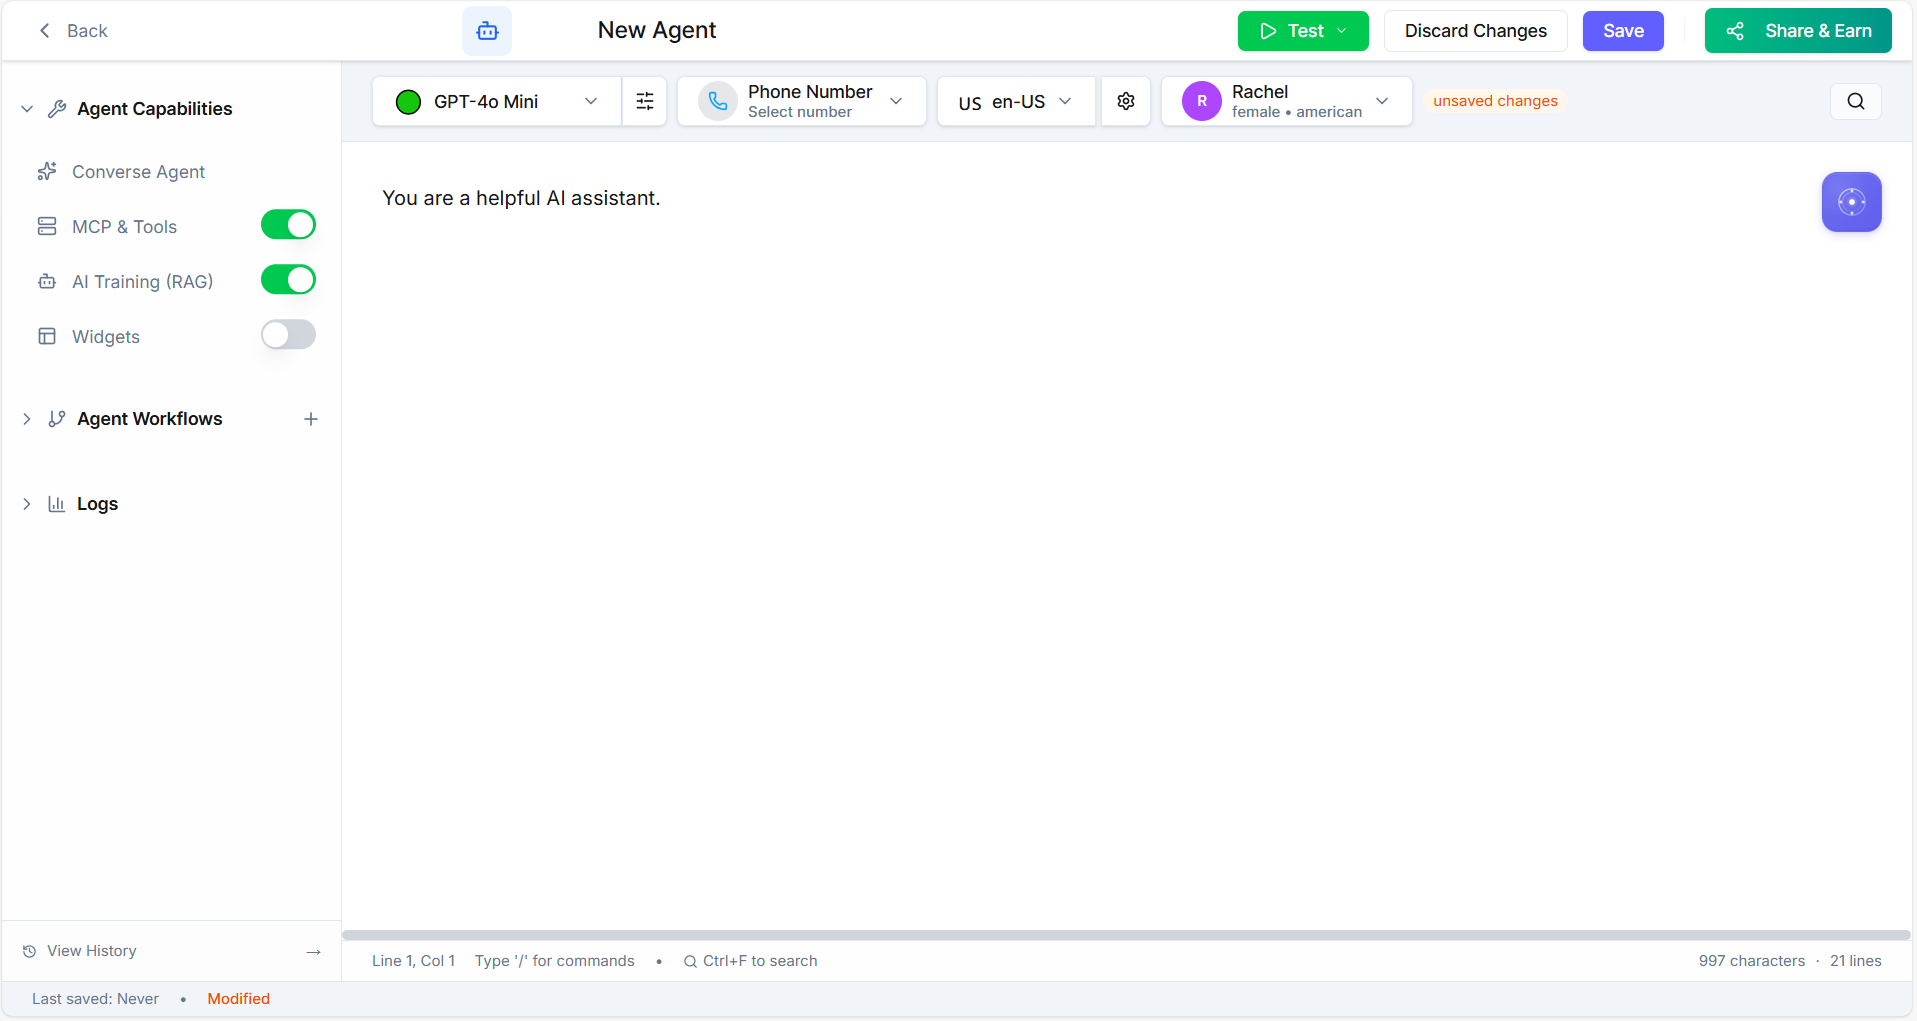
Step 1: Create a voice assistant
- Creating a voice assistant is easy in votel. When you login to your votel portal, you'll be landed to agents tab. There you'll see a button "Create Agent". Once you click on that, you'll see the following window.
Step 2: Select your AI Model
Votel allows you to choose from different AI models to power your voice agent. Each model offers a unique balance of intelligence, speed, and cost-efficiency choose one based on your needs:
-
GPT-4: Ideal for deep, high-quality conversations that require strong reasoning and understanding.
-
GPT-4 Turbo: A faster and more affordable version of GPT-4, suitable for most business use cases.
-
GPT-4o: Optimized for real-time voice and multi-modal interactions (voice, text, and visual inputs).
-
GPT-4o Mini: Lightweight and cost-effective; best for simple or large-scale outbound campaigns.
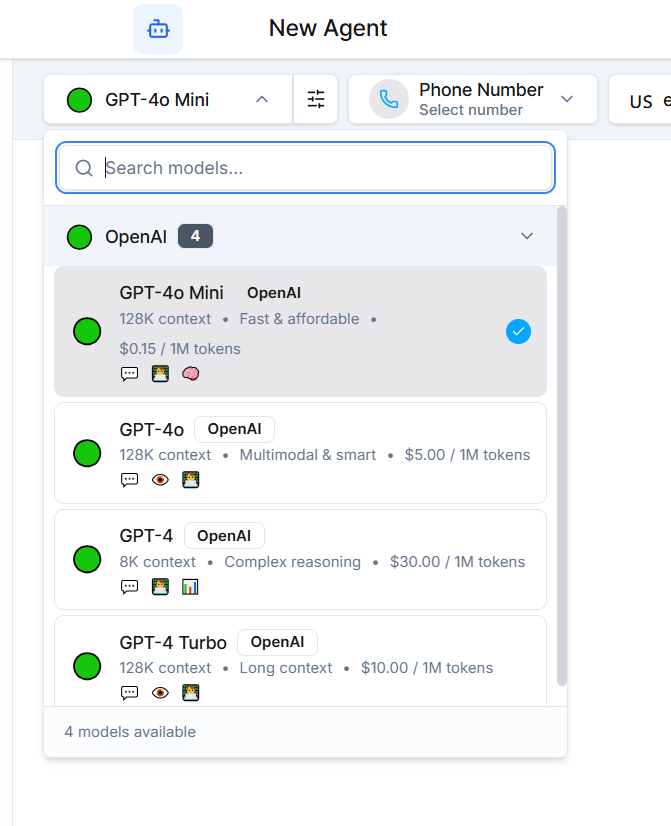
💡 Tip: If you're unsure, start with GPT-4 Turbo. it provides an excellent balance between performance and cost for general communication.
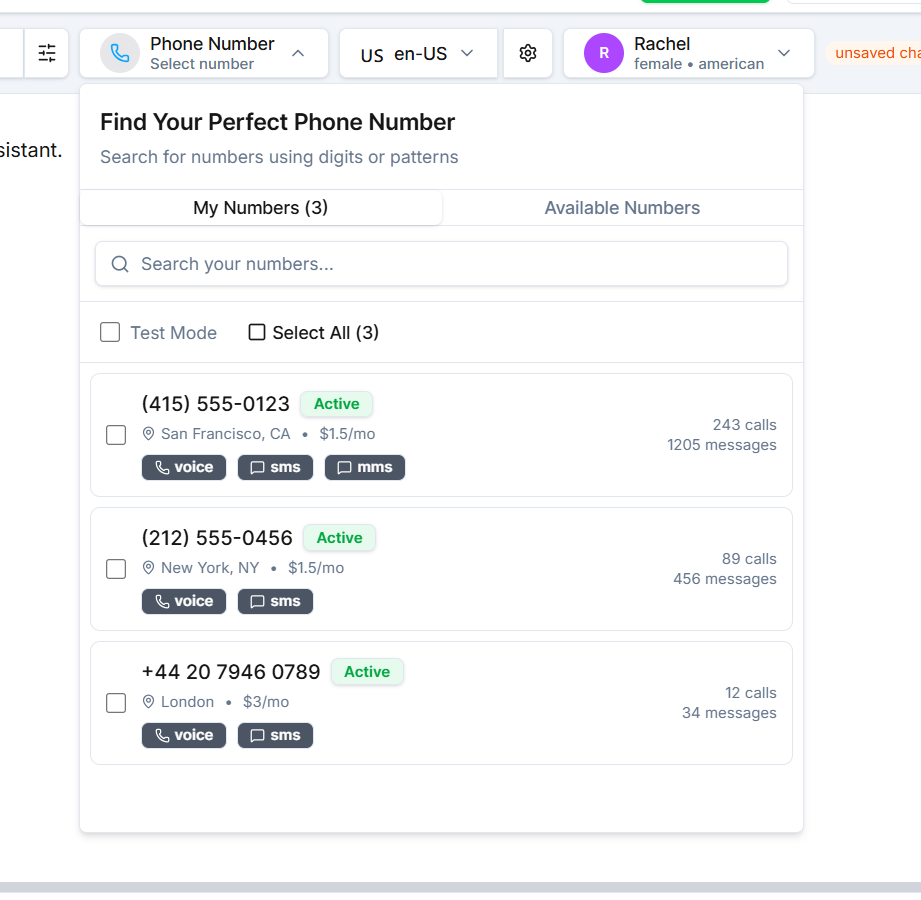
Step 2: Select Your Phone Number
After choosing the AI model, select which phone number(s) your agent will use for communication.
You'll see two options in the dropdown menu:
My Numbers
This tab displays the phone numbers you already own in your Votel account. Each number will show its capabilities such as Voice, SMS, or MMS depending on the number type and provider.
💡 Note: Not every number supports all capabilities. Choose one that fits your campaign needs.
You can also assign multiple numbers to a single agent if you want them to handle calls or messages from different lines.
Available Numbers
If you need a new number, go to the Available Numbers tab. Here you can:
- Select a Country from the dropdown list.
- Enter a Number Pattern (optional) to search for specific digits or area codes.
- View a list of available numbers that match your criteria, along with their monthly cost. Once you find the right one, click "Buy Now" to instantly add it to your account.
Step 3: Select a Language
Next, choose the language your agent will use for voice interactions. Votel supports a wide range of languages and accents to help you connect better with audiences around the world.
You'll find language options grouped by regions for easier selection:
- Europe – e.g., English (UK), French, German, Spanish, Italian
- Americas – e.g., English (US), Portuguese (Brazil), Spanish (Mexico)
- Asia Pacific – e.g., Chinese, Japanese, Korean, Hindi
- Middle East & Africa – e.g., Arabic, Turkish, Swahili
- Oceania – e.g., English (Australia, New Zealand)
You can search the language you want if you don't want to go through all these languages.
💡 Tip: Choose the accent and language variant that best matches your target audience for a more natural conversation experience.
Step 4: Select the Voice of the Agent
Now, choose how your agent will sound during voice interactions. Votel offers a variety of voice options powered by leading providers such as ElevenLabs, OpenAI, and Cartesia. Each offering natural, human-like tones.
After selecting a voice, you can further customize it using the Voice Settings panel:
- Model Type: Choose from versions like Turbo v2.5, Turbo v2, Multilingual v2, or Monolingual v1, depending on your language and performance needs.
- Speed: Adjust how fast or slow your agent speaks.
- Stability: Controls how consistent the tone and pitch remain throughout the conversation.
- Clarity + Similarity: Fine-tune the naturalness and resemblance of the voice to human speech.
- Style Exaggeration: Add expressiveness or emotion to the agent's delivery.
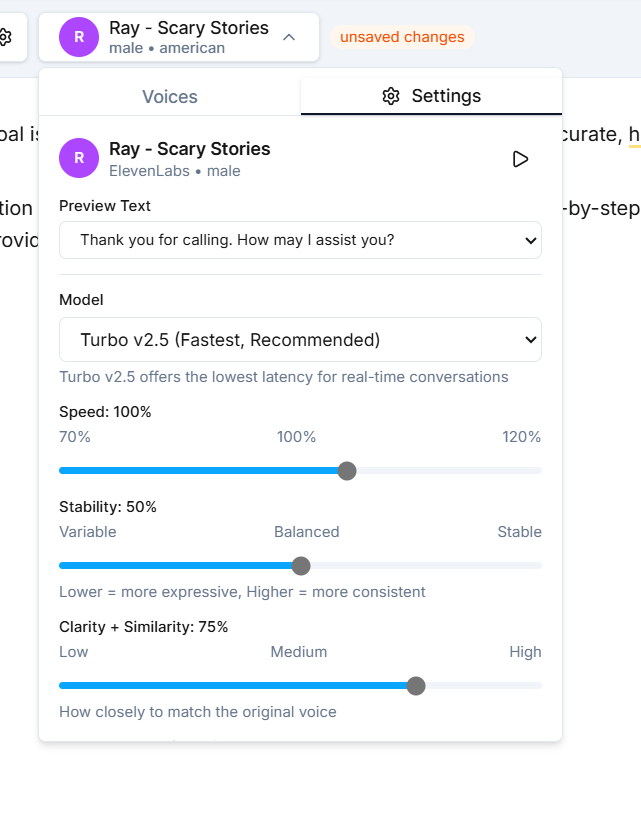
💡 Note: All these settings come pre-optimized by default, so you can use them as-is or fine-tune for a custom voice experience.
Step 5: Define Personality & Tone
In this step, you'll set how your agent thinks, speaks, and behaves by defining its system prompt. The system prompt acts as your agent's core instruction, guiding its personality, tone, and communication style during every conversation.
You can use this section to:
- Define the agent's role e.g., sales representative, customer support assistant, or receptionist.
- Set the tone of voice friendly, professional, persuasive, or empathetic.
- Add behavioral guidelines how to greet customers, handle objections, or respond to specific scenarios.
- Specify dos and don'ts phrases to use or avoid, escalation rules, or brand-specific communication preferences.
💡 Tip: Write your system prompt as if you're giving detailed instructions to a team member. For example: "You are a polite and confident sales assistant who always greets the caller by name and offers help in a friendly, upbeat tone."
Step 6: Test Your Agent
Your agent is now ready to test! After completing the setup, click "Save" to store your configurations.
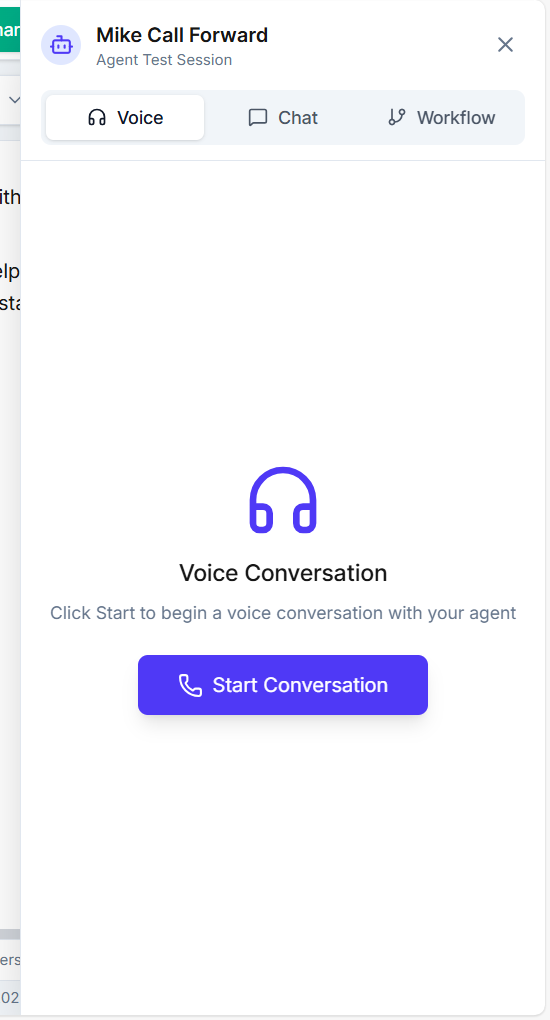
Once saved, click the "Test" button to try your agent in action. You'll see two testing options:
- Voice Test: Start a live conversation through the web phone interface to hear how your agent sounds and responds in real-time.
- Chat Test: Open a chat window to test your agent's text-based interactions and review how it handles written communication.
💡 Tip: Use the test feature to verify your agent's tone, response accuracy, and conversation flow before activating it for real users.