Email Node
The Email Node sends emails as part of your workflow. Use it for follow-up messages, appointment confirmations, document delivery, or any other email communication triggered by your workflow logic.
Configuring the Email
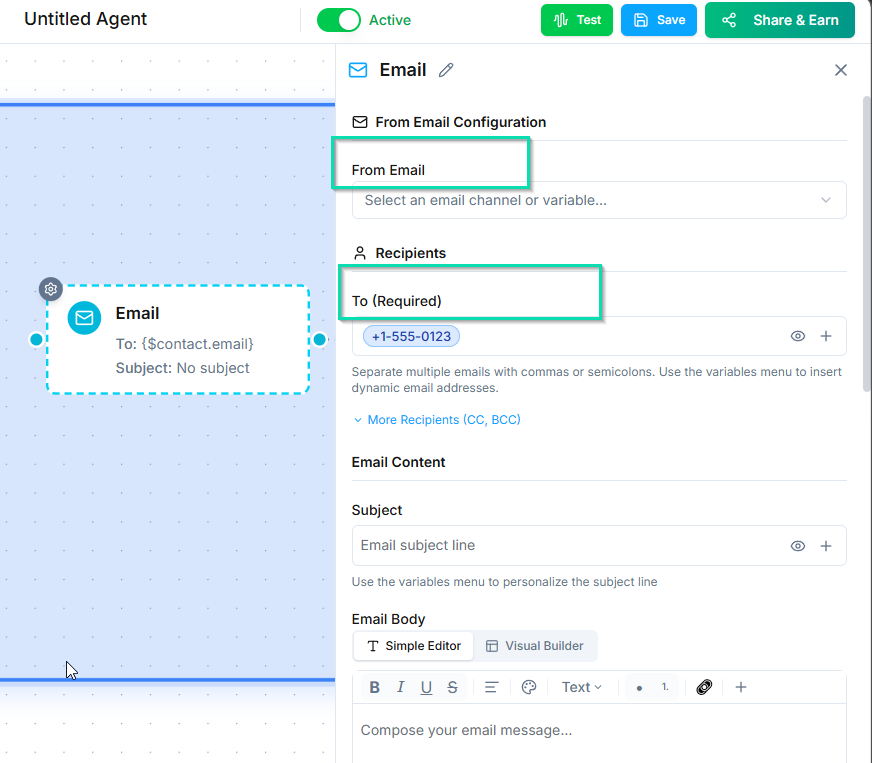
From
Select the sender identity the email will come from. This must be a verified sender identity configured in your account. The sender name and email address appear in the recipient's inbox.
To
The recipient's email address. This is typically pulled from the contact's profile, but you can also use a workflow variable or enter a static address.
Subject
The email subject line. Use variables to personalize it:
{{first_name}}, here is your appointment confirmation
Body
Write the email body using the rich text editor. You can:
- Format text with headings, bold, italic, and lists.
- Insert variables to personalize content (e.g.,
{{first_name}},{{appointment_date}},{{summary}}). - Add links and images.
Keep emails clear and concise. The recipient should immediately understand why they received it and what, if anything, they need to do.
Attachments
Attach files to the email by providing URLs. Use this for sending:
- Contracts or agreements
- Invoices
- Informational PDFs
- Any document relevant to the conversation
Timing Controls
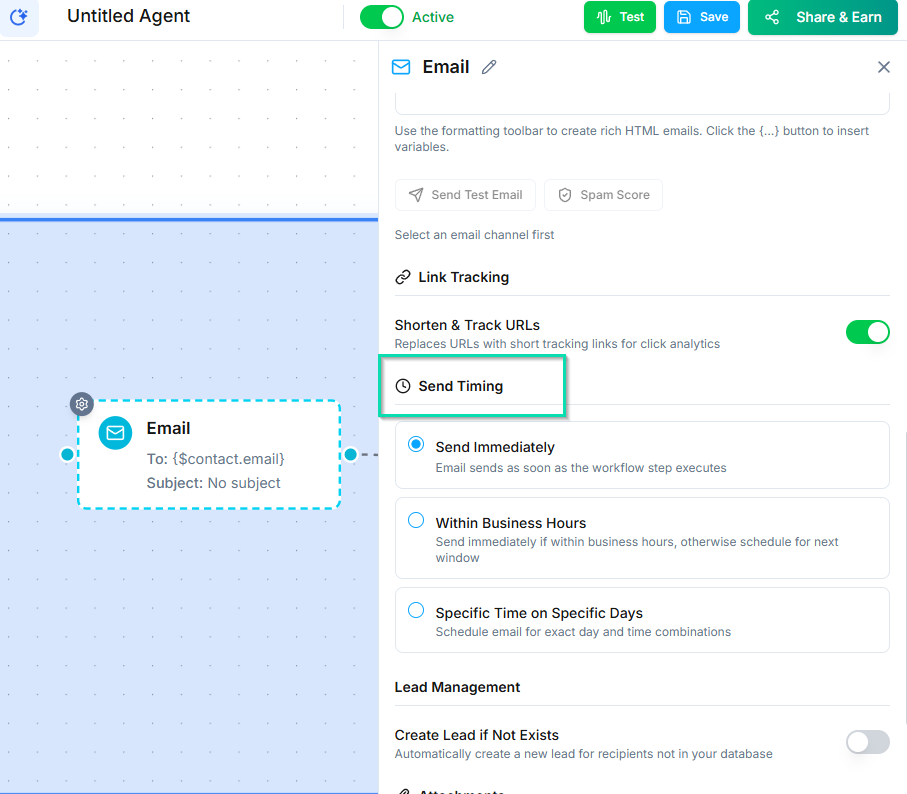
Control when the email is sent:
- Immediately — sends as soon as the workflow reaches this node.
- Scheduled — sends after a delay or at a specific time.
Use scheduled sends for follow-up sequences — for example, sending a summary email 10 minutes after a call ends, giving the system time to process the conversation.
Wait for Reply
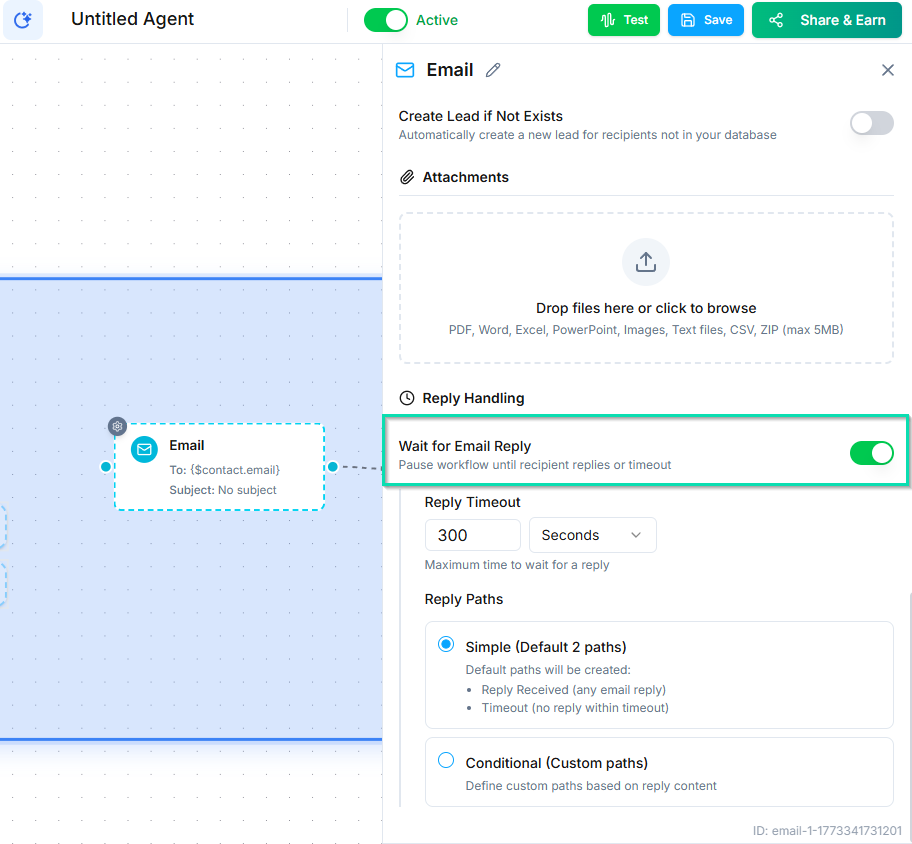
Enable this option to pause the workflow until the recipient replies to the email. When they respond, the workflow continues to the next node with the reply content available as a variable.
Set a timeout to define how long the workflow waits. If no reply arrives before the timeout, the workflow follows a separate timeout path so contacts are not stuck indefinitely.
Next Steps
- SMS Node — send text messages as part of your workflow
- Sender Identities — configure the email addresses and phone numbers your workflows send from